Printmaking is an art technique that many kids are have not yet been familiarized with. We’ve prepared a printmaking lesson for kids which will make it easier for you to introduce this technique to your students.
If you teach art at home for your own kids, or to a group of kids, this is a great lesson that they will really enjoy and one that will never leave them, because once you know how to do it, and you create your own stamps, you can reuse them over and over again.

*this post contains affiliate links*
A great way to explain the idea behind it to them is to show them some company logos that they will recognize, and then show them a rubber stamp to illustrate how you can take an image. If you have a tool like a stamp, reuse it over and over to put on advertising, signs, t-shirts, mugs…etc.
I would have plenty of regular stamps and tools on hand for them to use and try out. Layering them on top of each other or various types on one print works really well too, and they can have a lot of fun with it.
TIP – If you need to find the foam pieces used to make the stamps that I will talk about, you can ask for the foam plates they use at the grocery store to hold meats.
I just ask the butcher if I can get a stack of them and that I’m teaching art classes where we will be using them. So far, they’ve always just given them to me. You can also cut them in half and get 2 out of each one.
Printmaking Lesson For Kids
What you will need for each student:
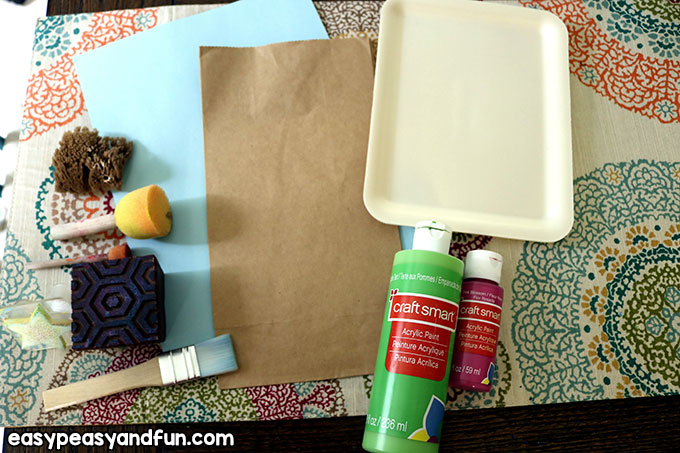
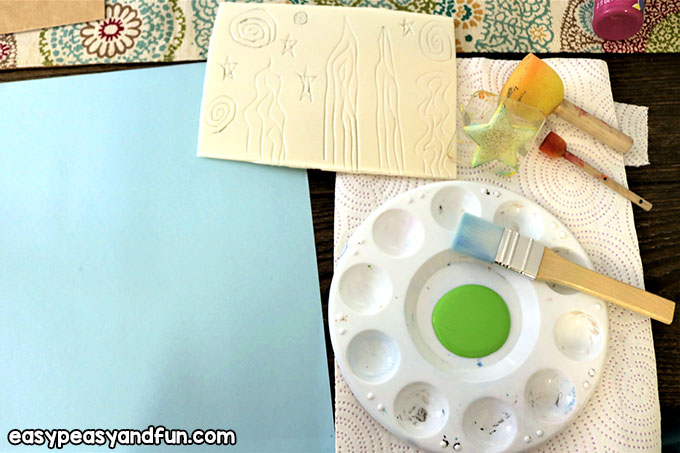
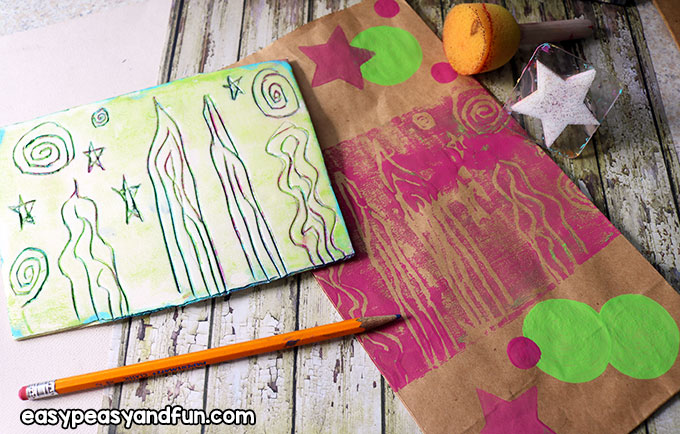
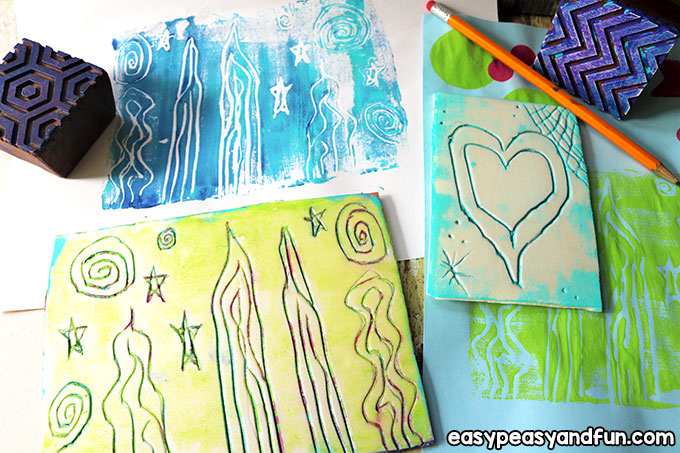
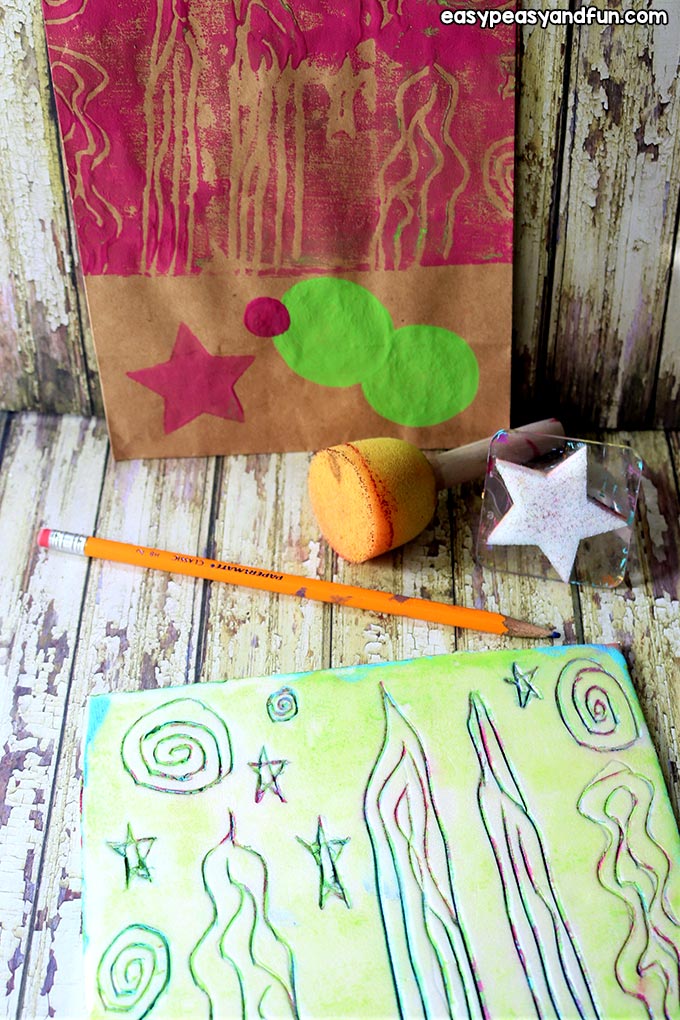
- various sheets of paper in white and other colors so they have choices and can make multiple prints
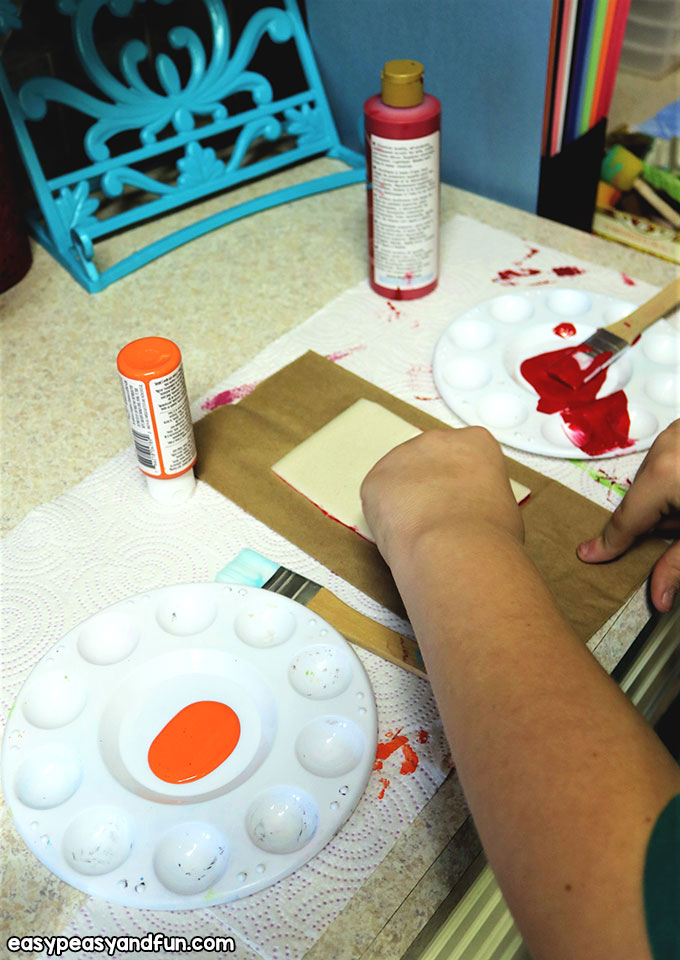
- also, brown or white paper bags are fun to have them make a print on as well
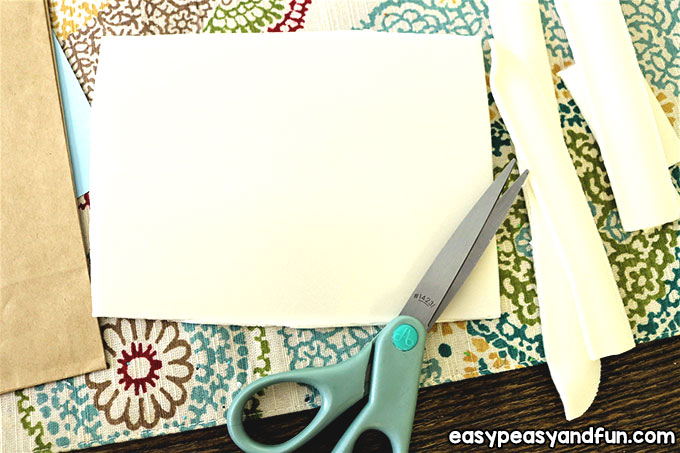
- pencil, slightly dull – do not sharpen
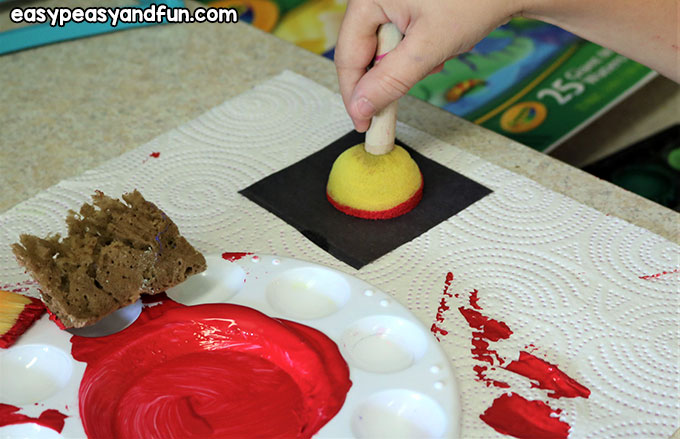
- acrylic paints in various colors
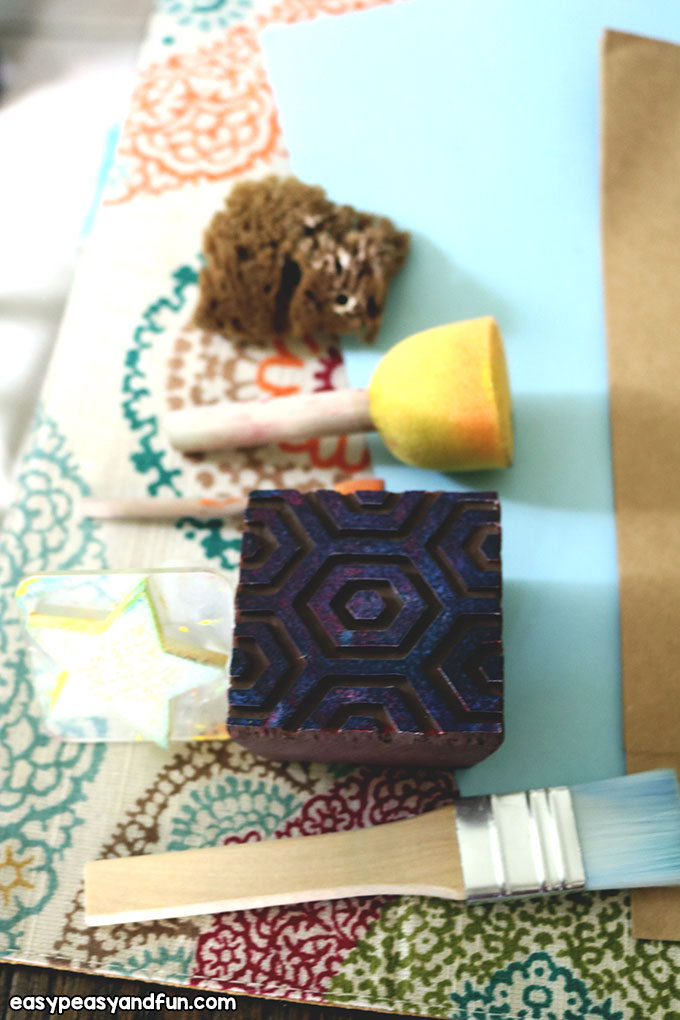
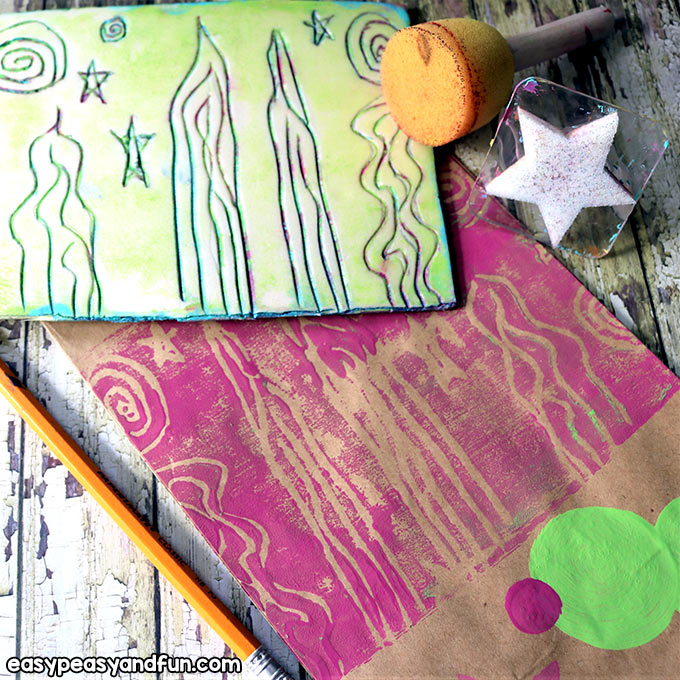
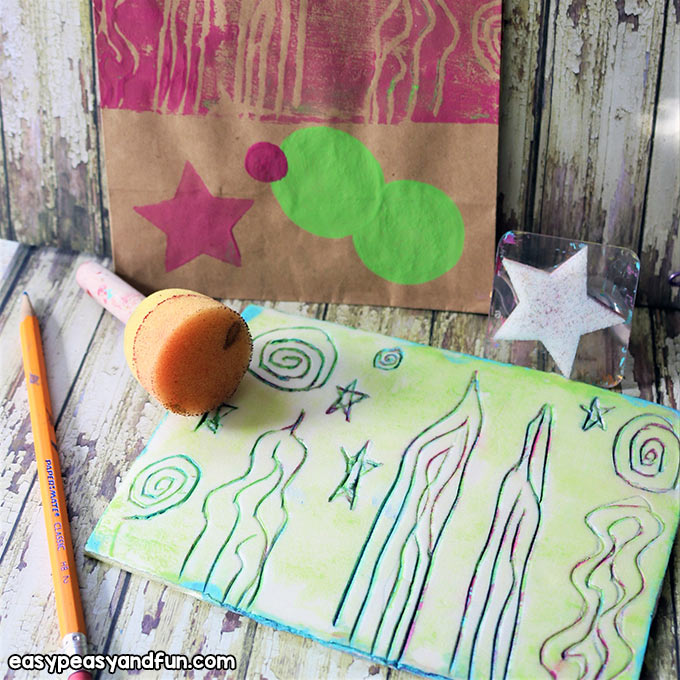
- stamps, foam tools or anything they may enjoy for adding texture or images with
- paintbrushes and rollers if you have them
- scissors
- glue sticks
- plates to roll out paint in – foam plates work well and I put out one plate per paint color
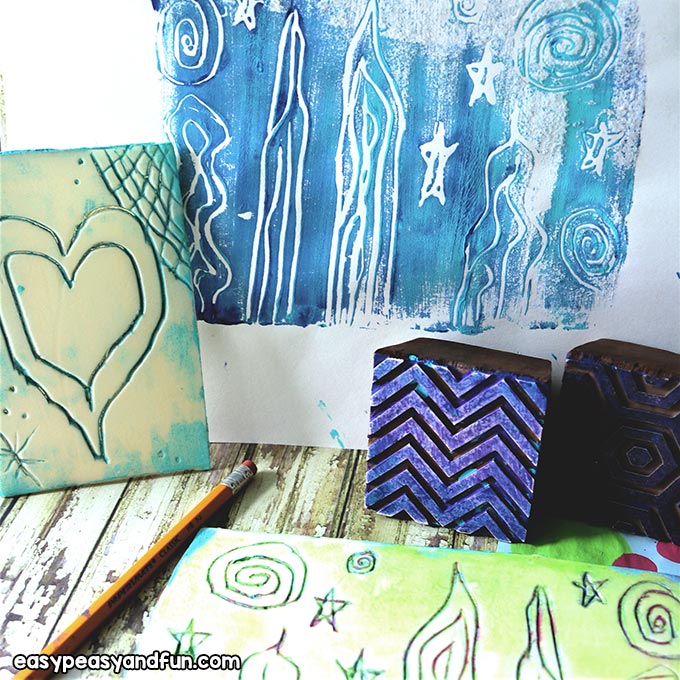
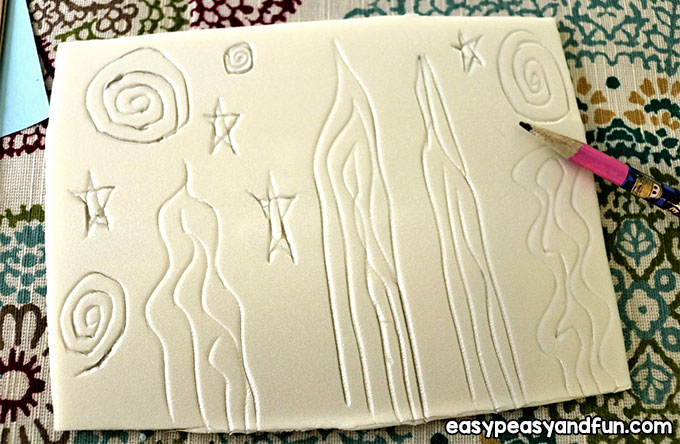
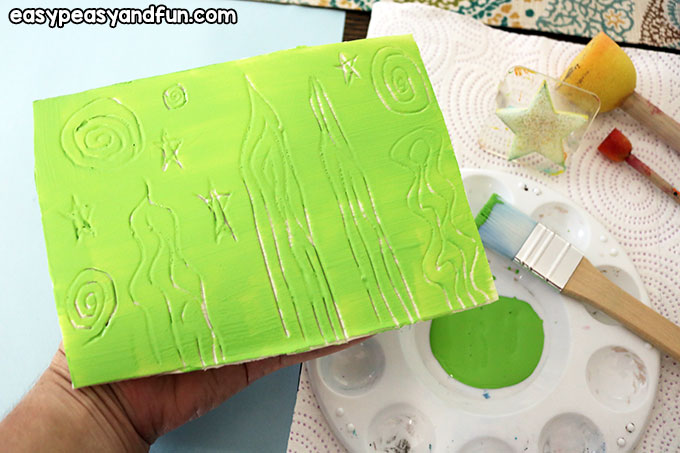
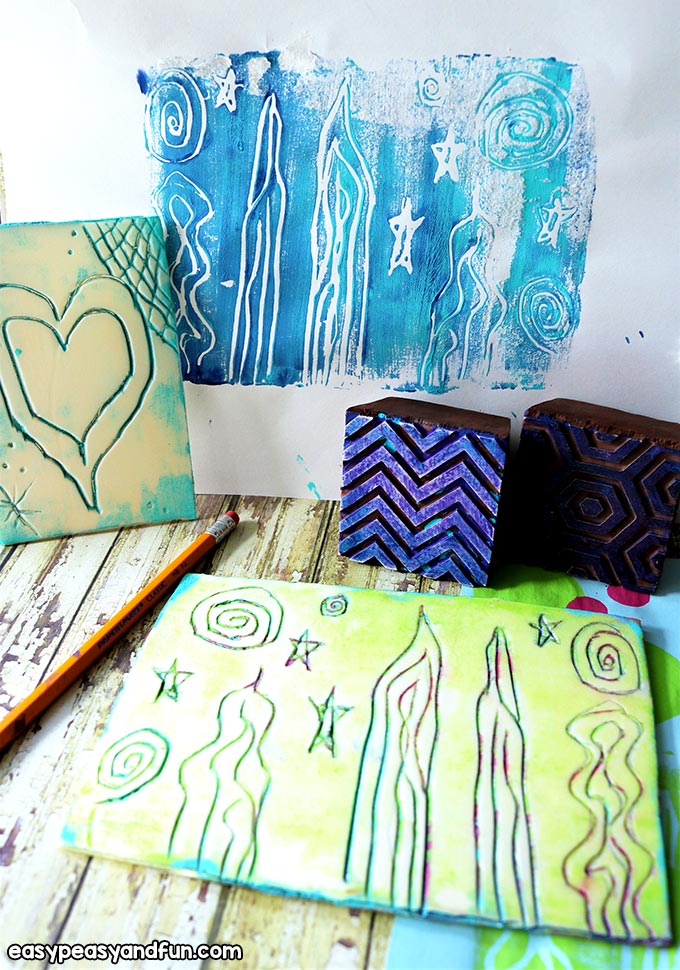
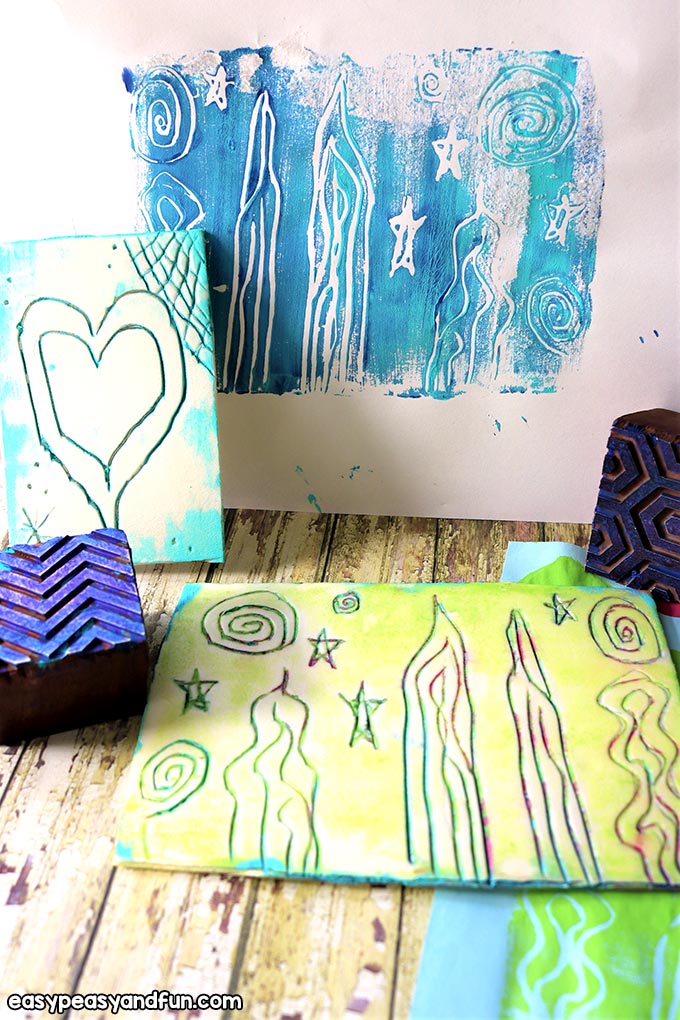
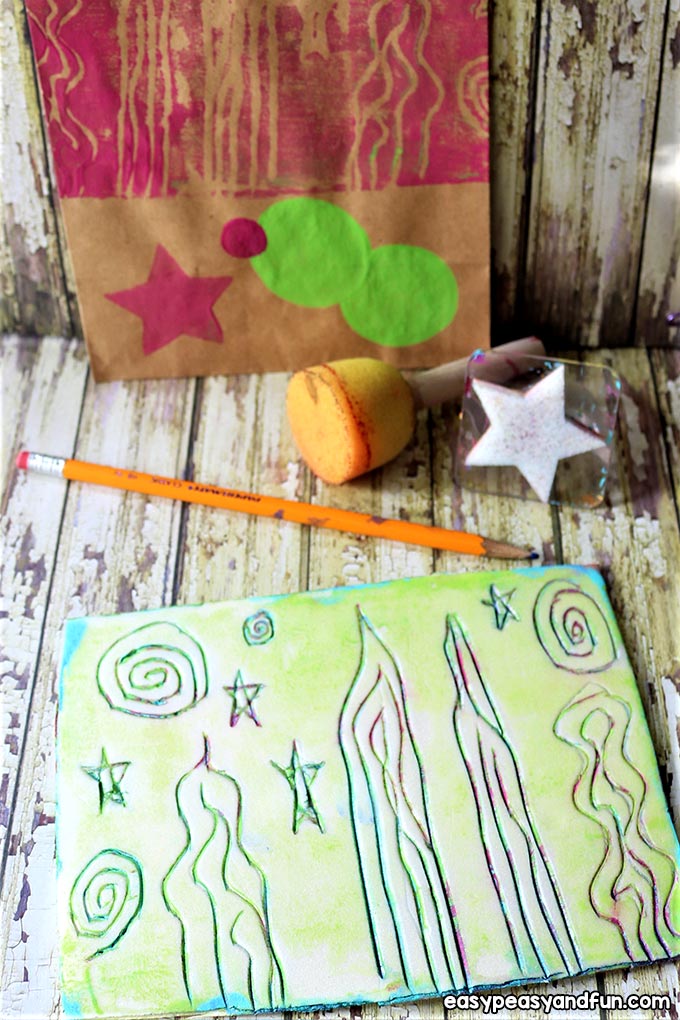
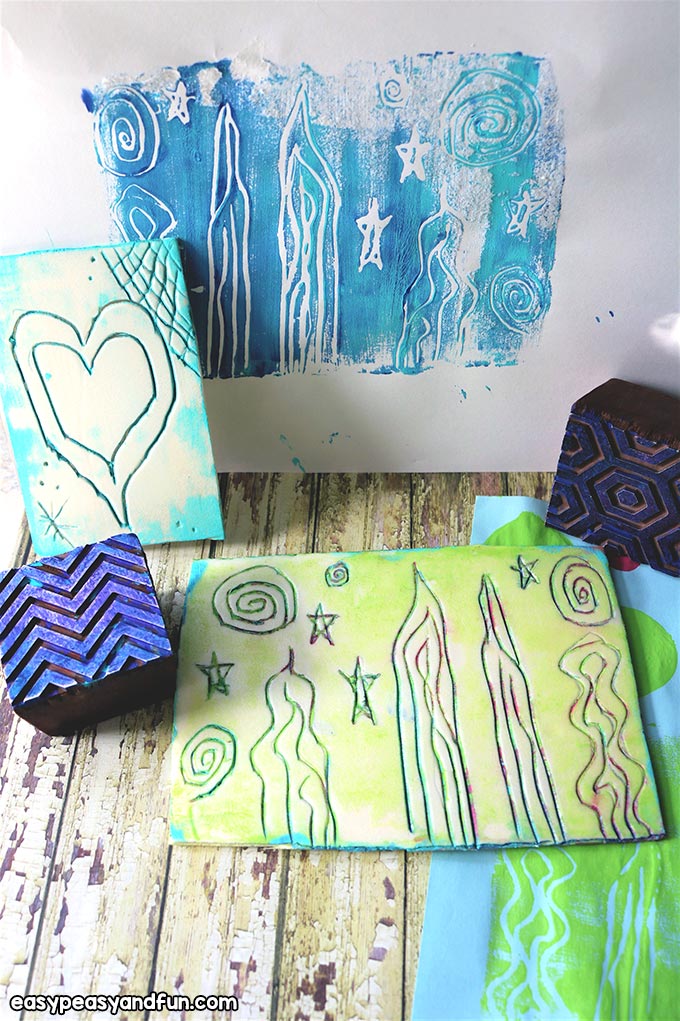
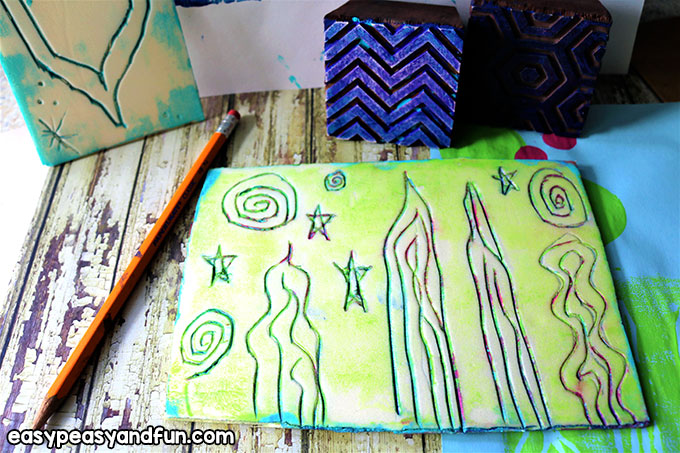
- one or two pieces of flat foam, cut into rectangular shaped pieces (TIP– Don’t make them too big, or they will feel overwhelmed with drawing a bunch of details on it)
- wet wipes
- and also, I suggest putting down a plastic tablecloth where they will be doing most of the work.
Step by Step Instructions
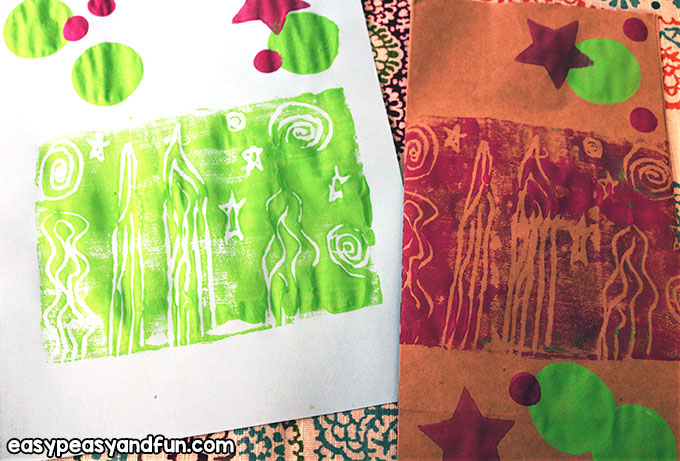
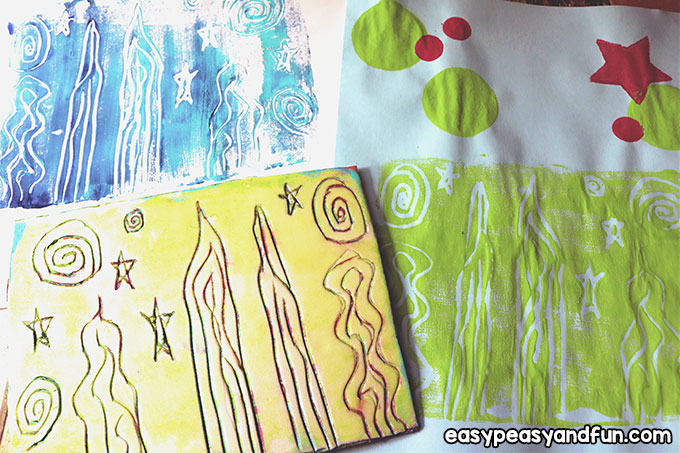
Begin by having them choose a color paper to make their first print on and explain that they should choose a paint color that will show up well on it (unless they choose white, which any color works on.)
Then, give them the foam rectangle and the pencil.
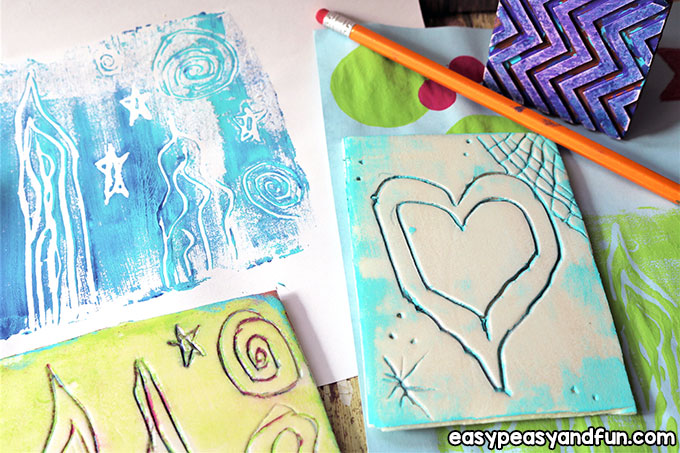
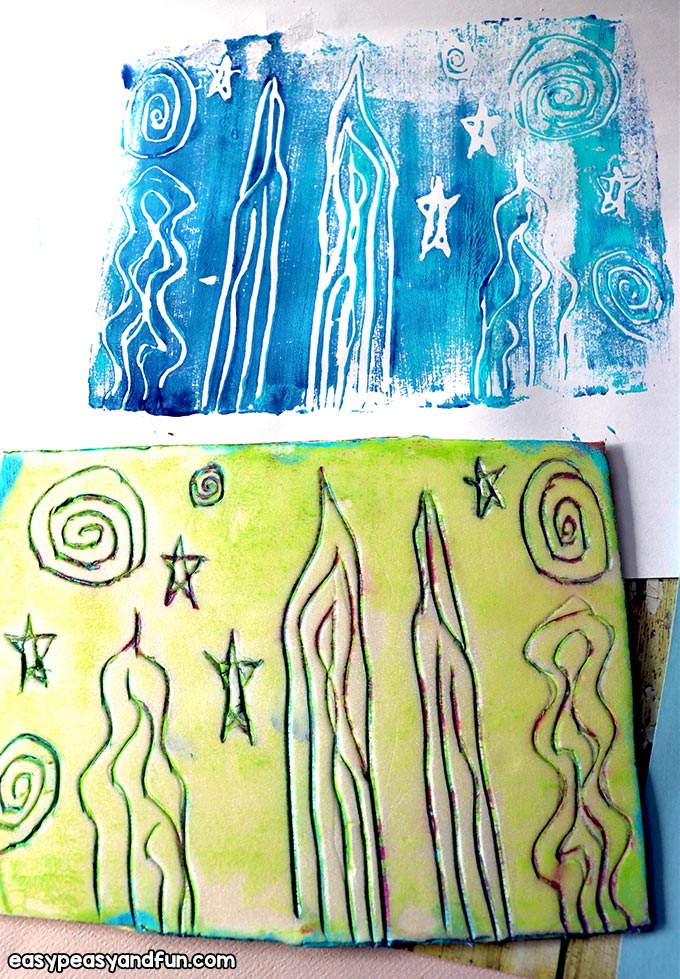
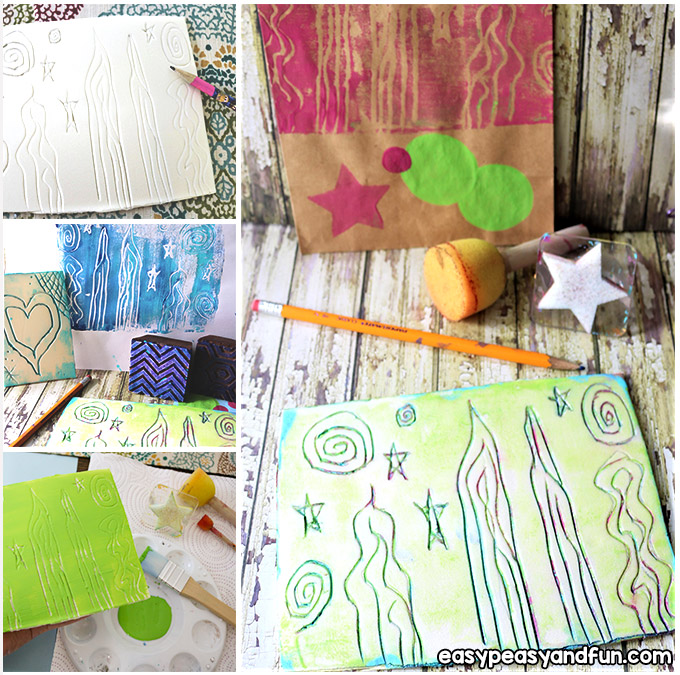
Have them create a cool image of something fairly simple and then add some accent lines or other smaller designs on it to add interest.
But they need to know that if they add too much, then before they are ready to print, the paint could dry, so not to go overboard with details.
Plus, they can layer other things over it or beside it on the print too.
The reason for the dull pencil is that if it is too sharp, it will poke through the foam and ruin the stamp.
Once they draw the image, have them gently go over it a second time to create a little depth to it, to help the paint stay out of that part of the stamp.
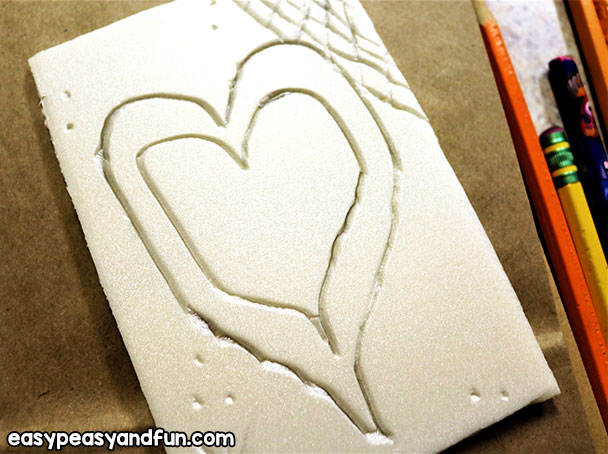
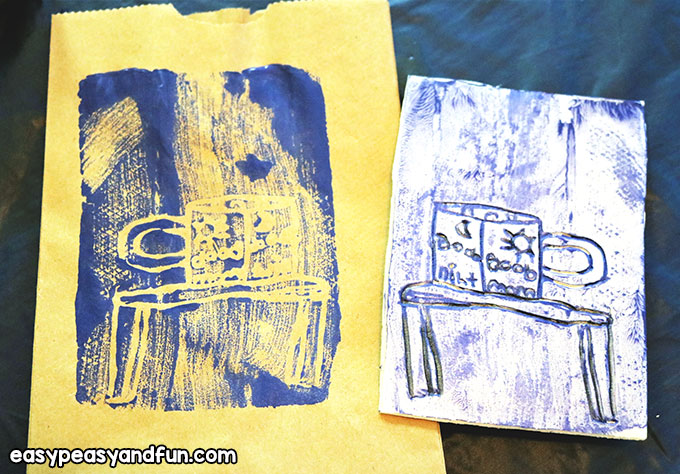
Basically, this works like a rubber stamp but in the reverse. The image is down in the stamp instead of raised above it.
If you are teaching this to multiple kids, then I would make paint color stations around the room – put a little of each color paint out on a plate and then they can rotate to the color they choose.
It is chaos if you try to keep pouring paint for everyone on their own plates and especially because half of them will want to use the same colors.
If it’s just a couple of kids at one table, place the paints in the center of the table and let them take turns with them.
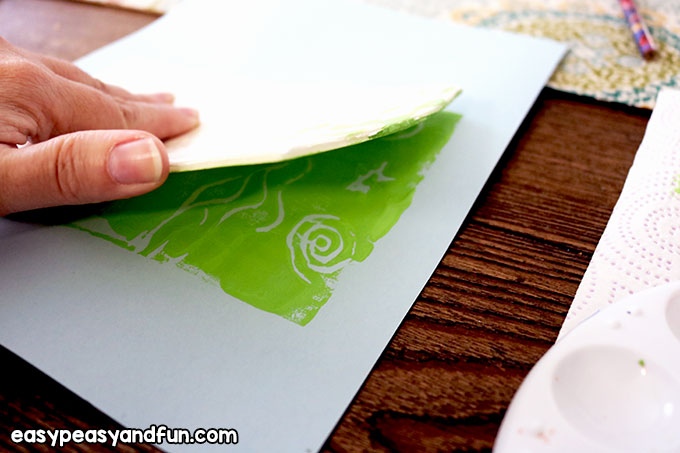
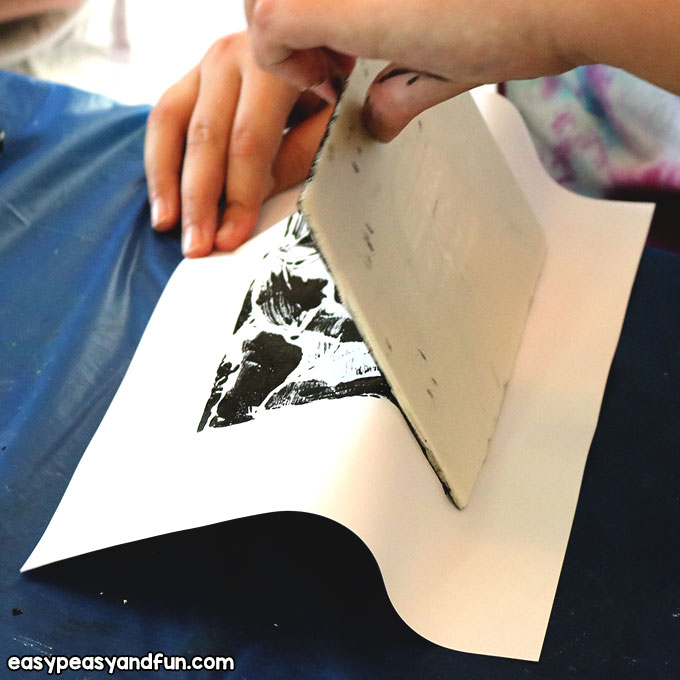
Now they can paint or roll on a layer of paint in their color choice, over the top of the stamp image they made.
If the paint goes down into the image lines, they can use the pencil and go over it to remove the paint.
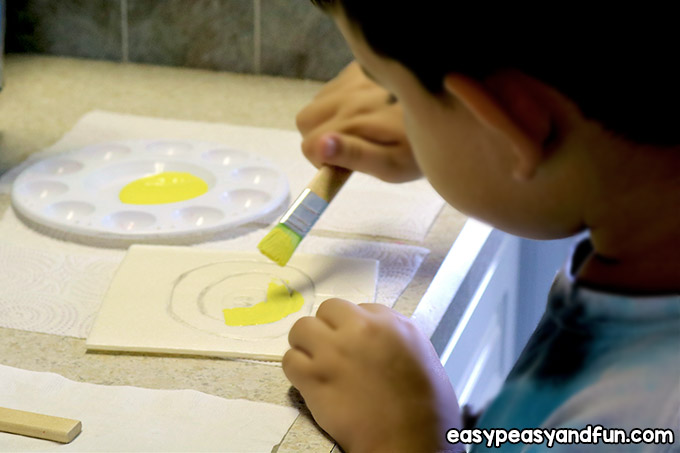
But working quickly so the paint doesn’t dry up is important. If the paint is too thick, it will be runny and they will know they need to thin it out some too.

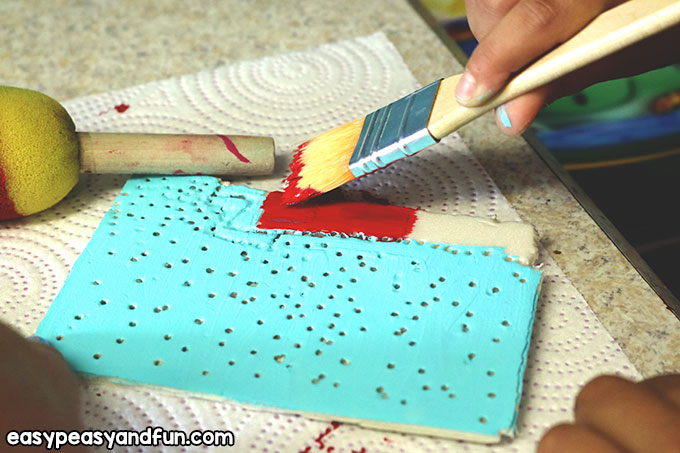
Now, have them flip over the stamp and lay it carefully on their paper, pressing down but careful not to slide it around, or the image will get ruined.
It may take once or twice for them to get the hang of this part, but once they do they can keep creating several prints in multiple colors.
Make sure they understand that with their own stamp, or any other stamp or tool, they need to wipe it down right away with a wet wipe, so it can be reused.
Now, all you need to do is to let them get creative!
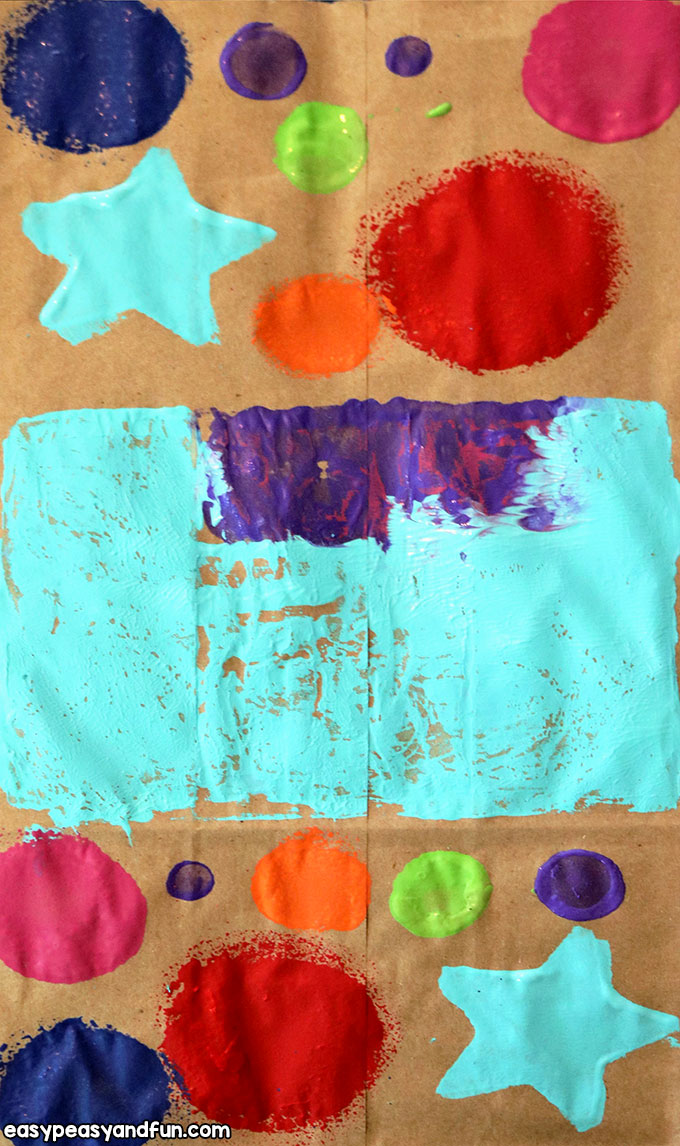
Have them layer on in multiple colors or use a paintbrush or sponge to add details or things too.
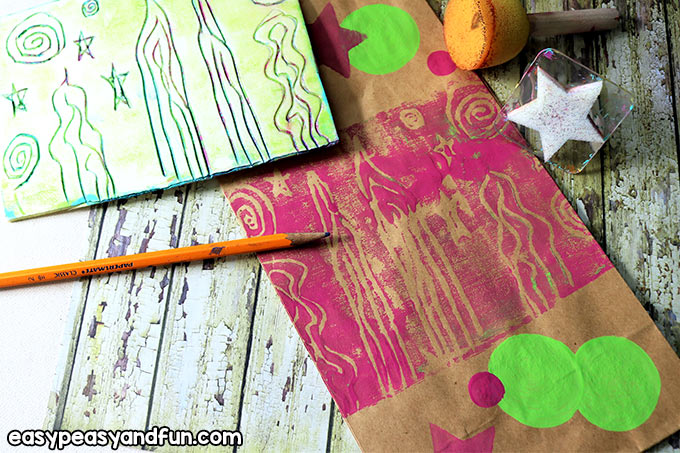
They can also make cards or layered prints by stamping on more than one piece of paper and then cutting and gluing them together. They mostly dry fast because of the paint having to be thin to start with.
Important TIP – If they want to make a word on their stamp, it has to be written backward.
Most of them will ruin the stamp trying if you don’t tell them this before you let them begin. For younger kids, I used little sticky notes and wrote the name out for them first, so they could see it and then copy it, and that worked well.
Encourage them to have fun and be creative and not to stress about the stamps looking perfect, it’s all about the process being fun.

Make as many as you like.
Happy Crafting.
Want instant access to all of our printable crafts, activities, and resources?

With thousands of crafts, activities, worksheets, coloring pages, and drawing tutorials to print, you will always have just the resource you need at your disposal. Perfect for parents and teachers alike!